
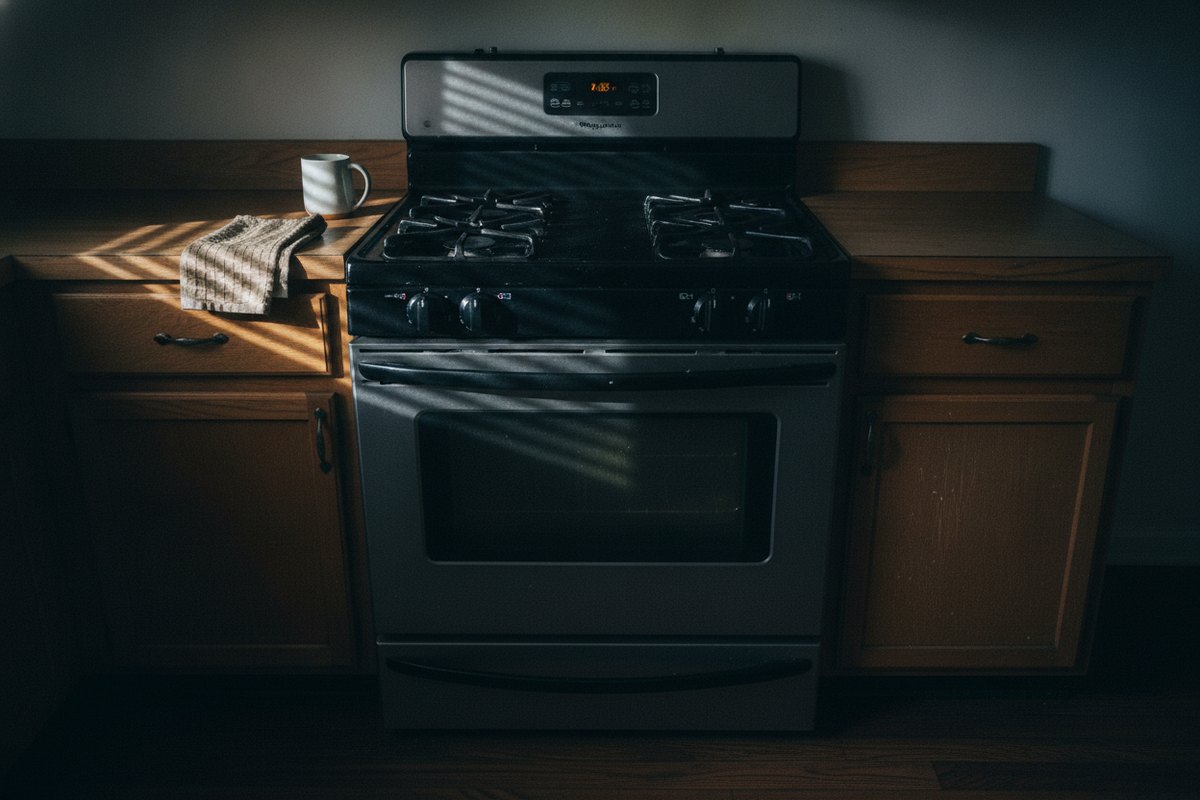
You set the oven, the clock is lit, the burners still work — and the cavity stays cold. Dinner’s waiting, and the oven is just sitting there. Frustrating? Absolutely. A sign your oven is done for? Usually not. Eight things cause this, and a technician rules them out in a fixed order: the free ones first, the parts last. Here’s the good news — five of the eight need no part at all.
We’ve spent 15+ years fixing ovens across metro Atlanta, so no fluff — just straight talk. In this guide, we’ll walk you through the eight causes from most common to least → the checks you can safely do yourself → where owner troubleshooting ends → what actually drives the cost.
First, let’s make sure this is your problem — two neighboring faults get described in the same words. An oven that went completely dark during or right after a self-clean cycle is a different failure with a different part behind it. An oven that does heat, only not to the number on the display, is a calibration question — and a gap there is often normal: GE puts the ordinary variation at about 30 degrees either side of the setting. This page is for the cold cavity under a live panel. That’s the version that most often ends as an oven repair visit.
Each cause below comes with the tell — the sign that separates it from the one above it. That’s what lets you place your own oven on the list before anyone opens anything.
Freestanding gas range in a lived-in kitchen with a lit clock and a cold oven
Causes, from most common to least
Eight of them, cheapest and most likely at the top. Work down, not across. Nothing in the first five needs a part — so you’re not paying for something you don’t need.
#1. Nothing is asking for heat
Sounds too simple? It’s GE’s own first item for an oven that will not come on. An electronic control needs three things before it will fire: a function, a temperature, and a press of Start. Knob models need both knobs in position. And GE adds the detail that catches people out: if the knobs came off for cleaning, they have to go back in the right place and the right way round.
The tell: the oven accepts your presses and shows a temperature, but never counts down and never shows a preheat indicator. Sabbath mode does the same on models that have it. It’s a religious-observance setting that disables every cycle except bake and silences the tones, and GE lists it as a check of its own.
#2. A delay start, lock or demo mode
Three settings hold a healthy oven cold, and each one looks like a fault. Delayed start: the bake won’t begin until the start time is reached — Whirlpool’s fix is to cancel the control and start the bake again. Control lock: cleared by holding the marked button — Whirlpool gives about three seconds — until the indicator goes out. Demo mode: it stops the oven operating at all.
The tell: a display that behaves perfectly while the cavity never warms. Demo mode announces itself, and Whirlpool lists the wording: an appliance in that state says “Try the Product,” “View Product Video,” or “Showroom Mode” after powering on. A showroom message, a padlock or a start-time icon? That settles it on sight — and it’s a free fix.
#3. The door, or the latch lever
An oven won’t fire with the door open. Whirlpool puts it plainly: make sure the oven door is closed all the way, because the elements will not come on if the door is open. Ranges with a mechanical self-clean latch have a second version of the same problem — a latch lever left part way across after a cleaning cycle. GE is specific about it: the self-clean door latch should be all the way to the left to be in the unlocked position, on gas and electric models alike.
The tell is physical: a door that doesn’t pull in over the last inch, a rack holding it a fraction open, or a latch lever sitting anywhere but hard left. Please don’t force a motorized latch that refuses to move. That’s a different fault, and the cam behind it breaks easily.
#4. The house circuit
GE publishes that electric ranges require 240/208 volts to operate. Why two numbers? American homes are wired to one supply or the other — and you don’t need to know which one is yours. What matters is that the range is getting all of it. Partial voltage produces exactly this complaint: the clock may work, but the burners will not heat properly.
How to check: start at the house fuse or breaker box — breakers on, fuses good — and make sure the power cord is pushed fully into its outlet. GE’s owner test comes next: turn a surface element to high and watch it. A coil that glows red across its whole length → the voltage is fine. One that doesn’t → it may not be.
Gas ranges fail differently, because their ignition system needs a properly grounded 120-volt outlet. Whirlpool publishes that correct operation of the surface and oven igniters depends on a good ground path, and that a two-prong adapter or an extension cord must not be used. Voltage that still reads wrong after a breaker reset? That belongs to an electrician, not to us.
#5. A lockout after a power event
Ovens ride out storms badly. Whirlpool publishes that during an outage, supply-line noise that the control reads as an incorrect voltage can leave a fault message on the display. Fix: switch the household breaker for the range off for one full minute, reset it, then watch the range for another minute to see whether the message returns. GE gives the same reset for a control that will not respond — and adds the part owners skip: do it even if the clock is working.
The tell is timing. The oven was fine, then there was an outage, a generator transfer or a breaker change, and it’s been cold ever since. Whirlpool is specific about a message that comes back: the outlet may be miswired, and that’s work for a qualified electrician rather than an appliance visit.

Gas pressure regulator shut-off lever behind the storage drawer of a range
Gas or electric: the last three
The first five apply to any oven. These three don’t — and here’s where it starts to depend on what’s under your cooktop.
#6. Gas: the shut-off on the regulator
This is the most missed cause on gas ranges, because the cooktop keeps working and hides it. Gas ranges have a shut-off valve on the pressure regulator. Whirlpool publishes what a closed one does: gas still flows to the cooktop burners, but it does not supply the oven. This isn’t the main gas valve on the pipe from the house. It’s a second, smaller valve on the appliance itself, and it gets moved during handling or transportation — or by a utensil in the storage drawer catching the lever.
GE describes the same trap. Models ship with the regulator on, but a knock or a bump can spring it back to off, and the top burners keep working while the oven does not. The tell: a flawless cooktop next to a dead oven, with a start date that lines up with the range being delivered, pulled out, or having the floor replaced under it. GE notes that the lever may not be obvious and that service may be needed to reset it.
#7. Gas: the igniter never glows
On a gas oven the igniter must heat before the safety valve releases gas, so an igniter that never lights leaves the cavity cold and quiet. GE publishes the owner check: set the oven to Bake, open the door and look for a red glow in the bottom of the oven towards the back. No red glow? GE says the igniter, the oven controls or other electrical components may be at fault.
Three ordinary things get in the way, all of them published by Whirlpool. Aluminum foil or a liner on the oven bottom blocks air or gas flow to the burner. An overloaded storage drawer lets pans and spare racks interfere with the igniter. An outlet without a proper ground starves the ignition circuit. The tell: a dark cavity floor while the oven is asking for heat. Smell gas at any point? Stop the checks, leave the house and call your gas utility from outside.
#8. Electric: an open bake element
The lower element is the last inexpensive answer. GE publishes the check: with the range off and the house breaker off or the fuse removed, inspect the bake element for cracks or breaks, and replace it if it is cracked or broken. That inspection needs nothing opened — the element sits inside the cavity, in plain sight.
The tell is visible damage: a split, a blister, or a bright scar on the lower element, often with a mark on the oven floor beneath it. Upper element still glows during a broil while the lower one never does? Write that down. It narrows the search before we even arrive.
Past the element, the list stops being owner work. A failed oven sensor or electronic control gives the same cold cavity, and GE’s instruction there is plain: a fault code on the electronic control is a call for a trained service technician.
Checks you can safely do yourself
Only attempt the checks below. Do not remove any panel or access any wiring — these appliances run on a high-voltage circuit, and work beyond the breaker and the visible access point should be done only by a qualified appliance technician. On gas models, do not adjust, reset, or disconnect the shut-off valve, the regulator, or any gas line yourself — that is service work at every skill level. If you ever smell gas, stop immediately, leave the house, and call your gas utility or 911 from outside.
Six checks, in the right order. Each one is done from the front of the appliance, with nothing taken apart — and none of them costs a thing.
- Read the display first. Write down whatever is on it — a code, a padlock, a start time — before you clear anything.
- Cancel everything. Then set a plain bake with no timer, no delay and no convection, and watch for a preheat indicator.
- Close the door until it seats, and check that a mechanical self-clean latch is all the way to the left, in the unlocked position.
- Reset the breaker. Switch the range breaker off for one full minute and back on. GE asks for this reset even when the clock is lit.
- Check the supply. On electric, turn a surface element to high and watch whether it glows red across the coil. On gas, find the main shut-off valve where the pipe comes through the wall or floor. Whirlpool describes most service valves as single-lever ball valves: the handle parallel to the line means gas flows, perpendicular means it is cut off.
- Look for the glow. On gas, set Bake, open the door and look for a red glow at the back of the oven floor.
Where owner troubleshooting ends
Worked through all six and it’s still cold? You’ve done the hard part. Everything past the breaker, the latch lever and the settings menu sits behind a panel. The bake element terminals, the igniter, the safety valve, the oven sensor and the control board all sit past that line. Reaching them means pulling the appliance out of its opening or taking off a rear cover, with the circuit dead for the whole job.
Two of those go further than tools. Nothing on a gas line is owner work at any skill level: not the connector, not the regulator body, not the shut-off itself. And voltage that reads wrong at the outlet is an electrician’s question first. That’s where owner troubleshooting ends — and why a cold oven with a live panel usually turns into a range repair booking rather than a weekend project. Let us finish the job.
What drives the cost of this repair
What this costs is decided by which of the eight causes it turned out to be — not by how alarming it looked. The first five are a visit and no part at all. A bake element is an inexpensive part in an easy place. An igniter or a gas safety valve puts the work on the gas side of the appliance. A sensor or a control board tips the balance the other way: the part is worth more than the time it takes to fit.
Three things stretch any of those. Access comes first: a slide-in unit trapped between cabinets, or a wall oven in a tall cabinet, has to come out before anything can be measured. Supply comes second: a part held in stock means one appointment; a part ordered against a model number means two. Availability differs sharply between makers, so the number on the rating plate matters more than the brand on the door. Coverage comes third: an appliance still inside its manufacturer warranty belongs with the maker’s own service first — we’d rather tell you that than take a job you don’t need to pay for.
Nobody can honestly put a number on a symptom described over the phone. It comes from a diagnosis with the model number in hand — the way our oven repair in Atlanta visits work across the metro area and the rest of Georgia.

Technician hands inspecting the bake element inside an open oven cavity
Frequently Asked Questions
My burners work fine — so why does the oven stay cold?
On a gas range, the usual answer is the shut-off valve on the pressure regulator. Whirlpool publishes that with that valve off, gas still flows to the cooktop burners but does not supply the oven. On an electric range the same split points at the lower bake element, which GE asks you to inspect for cracks or breaks with the power off.
Can I fix an oven that won't heat myself?
Part of it, yes — and it’s worth trying first. Settings, a delay start, a control lock, demo mode, the door, the self-clean latch lever and a breaker reset are all owner checks that need no tools. The bake element, the igniter, the gas safety valve, the oven sensor and the control board sit behind panels on live circuits. Those are service work.
How do I tell an igniter problem from a gas supply problem?
Set the oven to Bake, open the door and look at the back of the oven floor. GE publishes that if no red glow appears there, the igniter or the controls are suspect. Igniter glows but the oven never fires? → The fault is further down the gas path. Either way, leave the valve and the burner to a technician.
My display works but nothing heats. Is the control board shot?
Not usually — it’s the last thing to suspect, not the first. GE publishes that partial voltage can leave the clock working while nothing heats properly, and a delay start, a control lock or demo mode produces the same picture. Rule those out first, because a board is the most expensive answer on the list.
Should I write the fault code down before clearing it?
Yes — exactly as it appears on the display, together with the model number from the rating plate. GE publishes that when the electronic control shows a fault code, a trained service technician should be called to diagnose it. Clearing the code without a note throws away the one piece of evidence that shortens the visit.
Still cold with the panel lit?
The settings are clean. The door seats. The latch lever is hard left. The breaker has been off and back on — and the oven still won’t warm. We know how annoying that is. But you’ve done everything an owner can do from the front. What’s left — an element, an igniter, a valve, a sensor or a board — sits behind a cover on a circuit that has to be dead before it opens.
Tell us what you saw, because it shortens the visit: burners fine, cavity cold, no glow at the back. Bookings go through the oven repair page. Same- or next-day appointments cover metro Atlanta, and our experienced, background-checked technicians — 15+ years in the field — work on gas and electric ovens alike. We fit genuine OEM parts, and our work is backed by a warranty of up to six months.
PRO Appliance Repair is an independent, family-owned repair company and is not affiliated with, sponsored by, or authorized by GE, Whirlpool, or any other appliance manufacturer named on this page. Brand names are used only to identify the equipment we service and remain the trademarks of their respective owners.